How to use the TreatGx software
Create an account
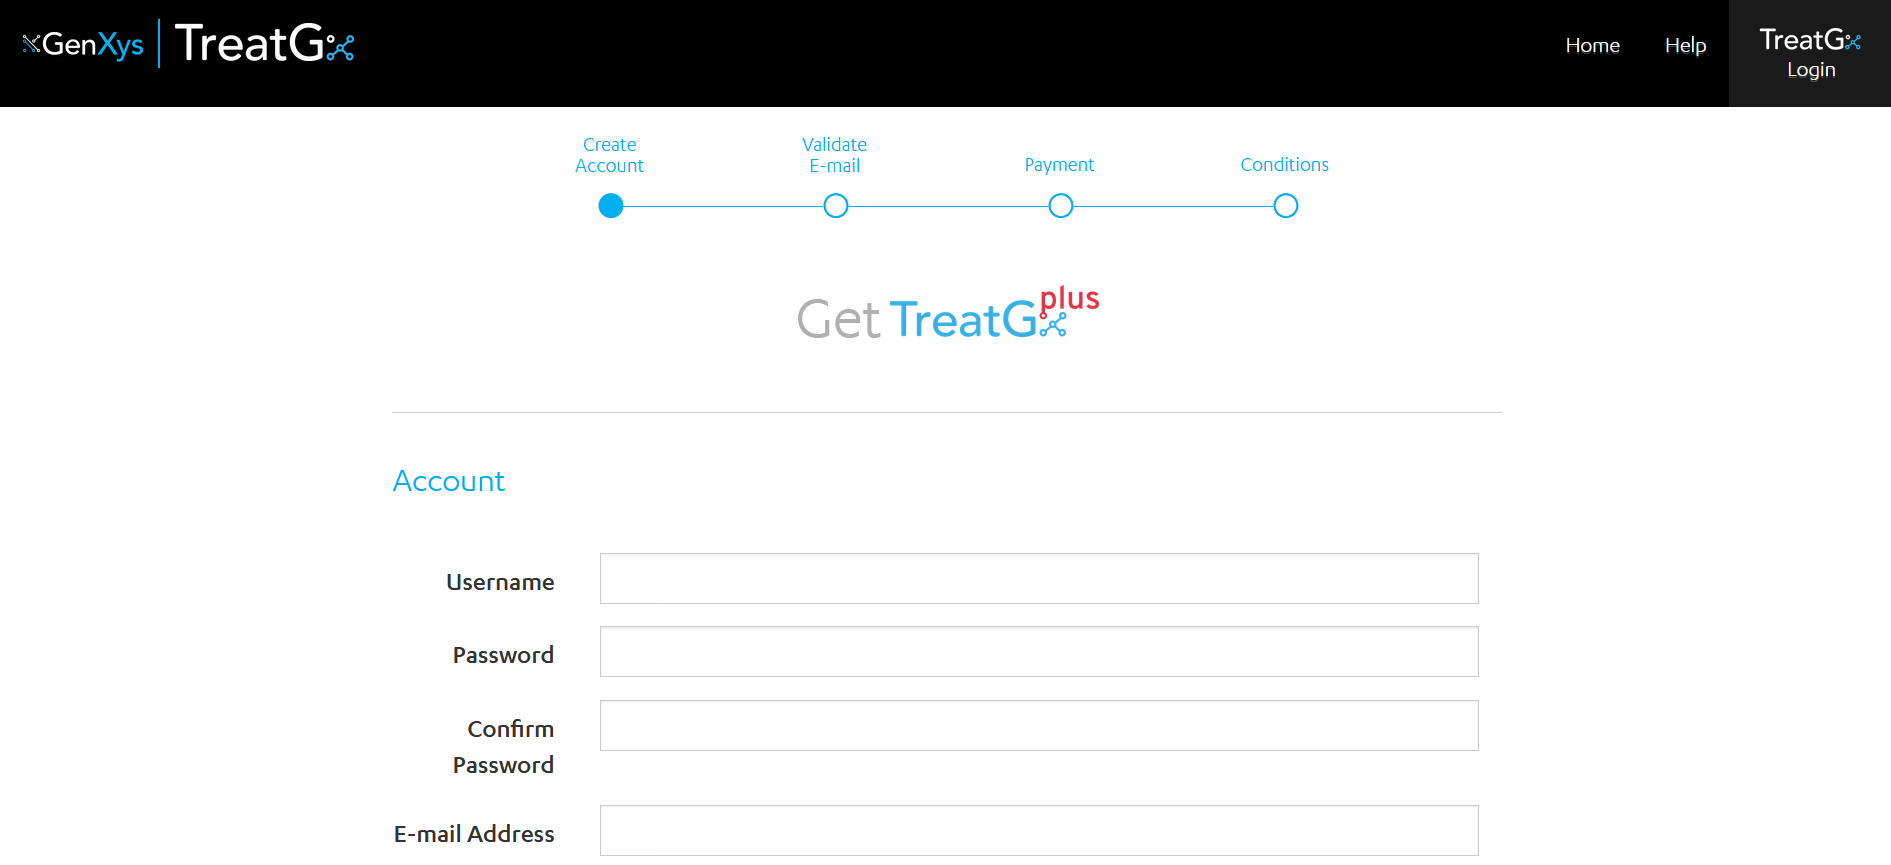
After you have received an email confirming that your TreatGxplus results are ready, follow the email link to create your account. You’ll need the PIN number from your TreatGx test kit.
Create a username and password, then enter your PIN from the TreatGxplus kit and your date of birth.
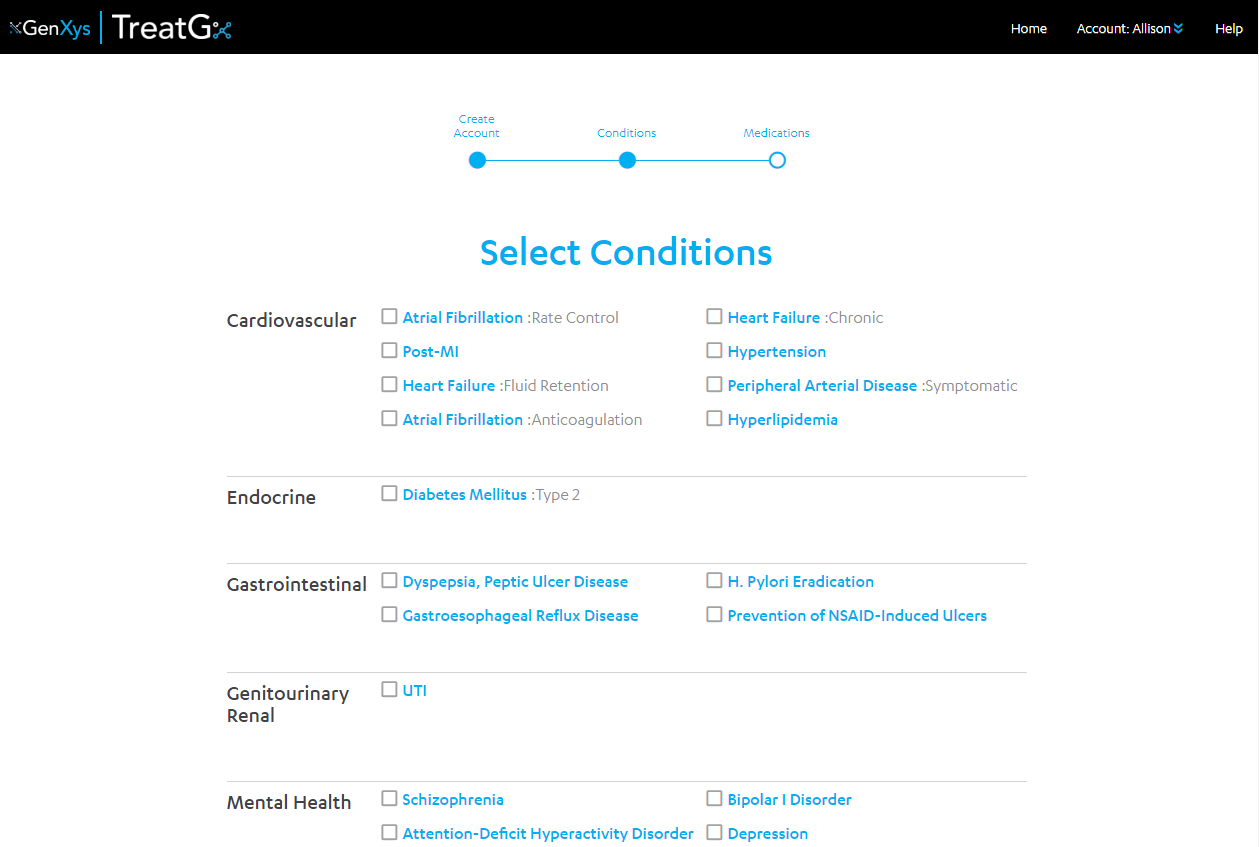
Select conditions for which you would like medication options or conditions for which you are taking medications.
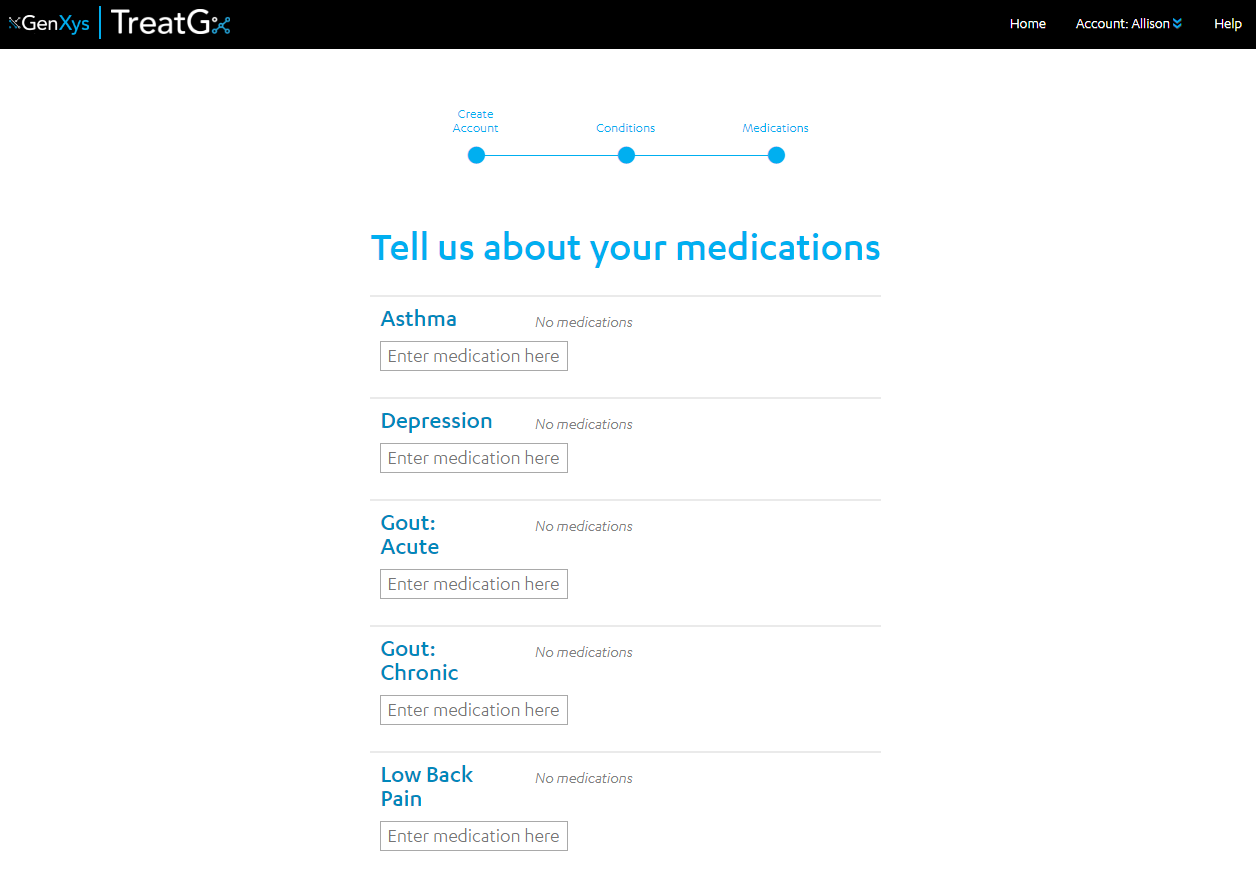
Enter any current or past medications under the relevant condition. If you are taking a medication for a condition that is not listed in TreatGx, enter it under “Other”.
Login to TreatGx
On the GenXys website, click the appropriate ‘Login’ button and use your username and password.

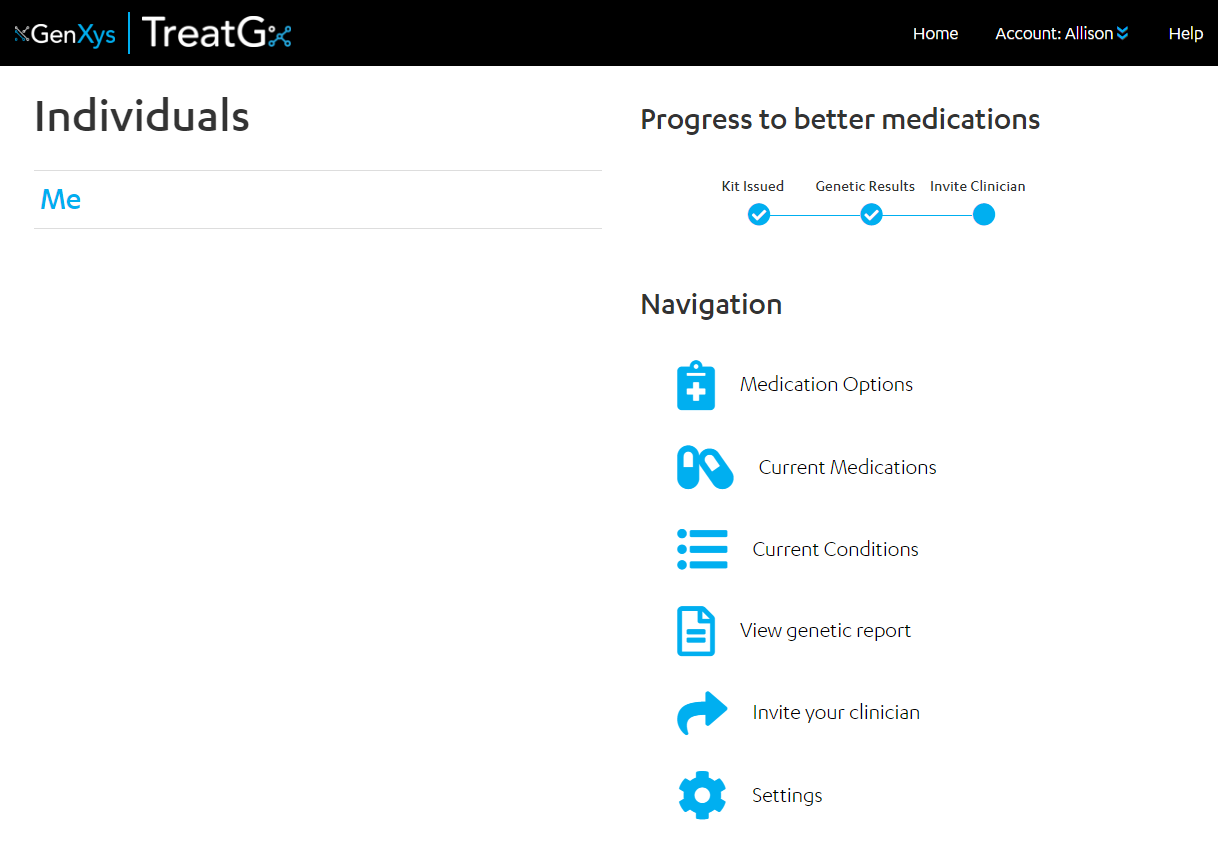
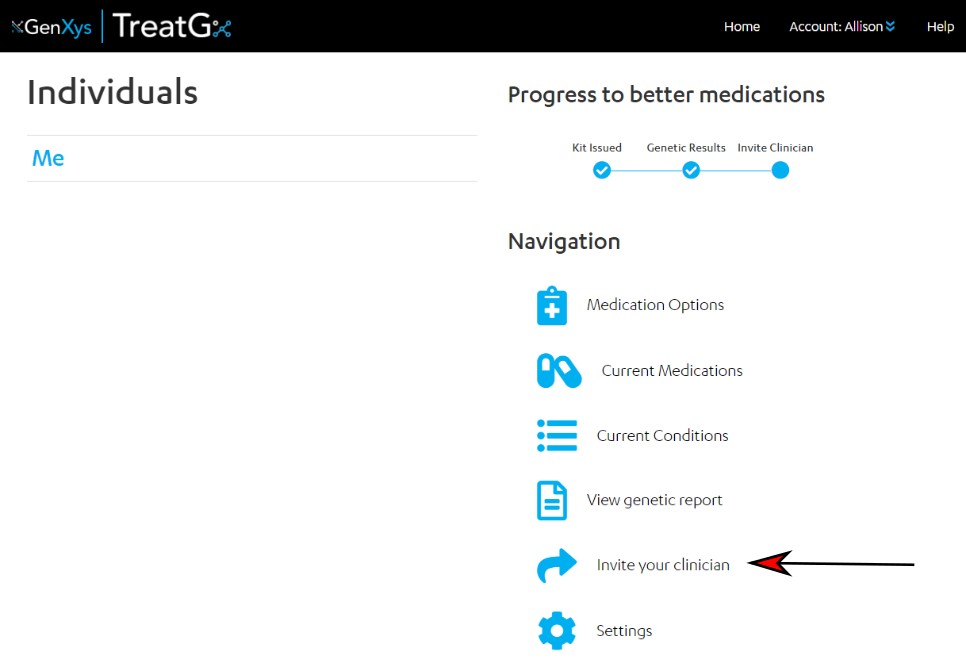
Medication Options will take you into the TreatGx decision support tool to create personalize medication options tailored specifically to you.

Current Conditions allows you to select any conditions that apply to you and you would like to appear on your profile.

Current Medications allows you to enter your current and past medications under the relevant condition (remember to enter your conditions first!). Any medications that are used for a condition not included in TreatGx can be entered under “Other.”
Inviting your clinician is an important step in the process towards better health. Remember, never start, stop or change your medications without consulting your health care provider.
View genetic report will provide you with a PDF of your pharmacogenetic report.
All the results from your pharmacogenetic report are automatically uploaded into the TreatGx decision support tool and are ready to use.
Settings allows you to view the healthcare providers you have invited to view your profile.
The progress bar on the top right section of the dashboard will tick off items as they are completed:

Kit Issued
Your kit has been issued and your pharmacogenetic results are ready! Your results are uploaded automatically into the TreatGx software.
Genetic Results
Enter your current conditions and medications, then use TreatGx “Medication Options” to create personalized medication options tailored specifically to you.
Invite Clinician
Inviting your clinician is an important step in the process towards better health. Remember, never start, stop or change your medications without consulting your healthcare provider.
Invite your clinician
You may send an email invitation to your healthcare provider so they can access your TreatGxplus profile.
From the TreatGx Dashboard, select ‘Invite your clinician’ from the Navigation menu.
There are two ways to invite your clinician.
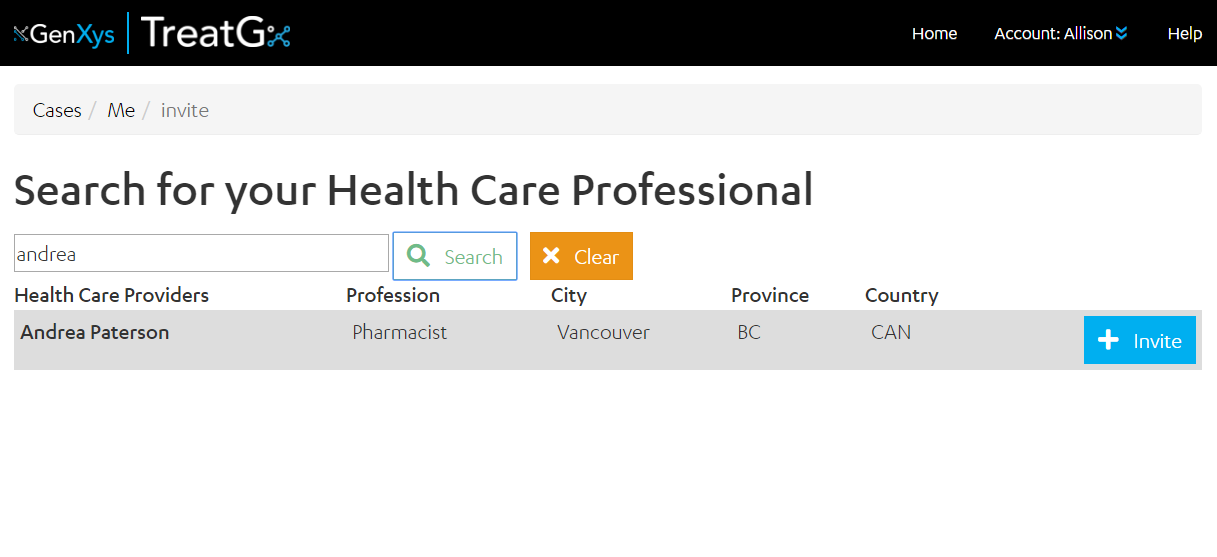
1. If your healthcare provider is already using TreatGx, they can be found by searching by name. Searching for your Healthcare provider is easy. Enter their first name or surname, search the list or filter by profession. To add your healthcare provider, click the ‘+ Invite’ button.
2. If you cannot find your healthcare provider’s name, you can send them an email invite.
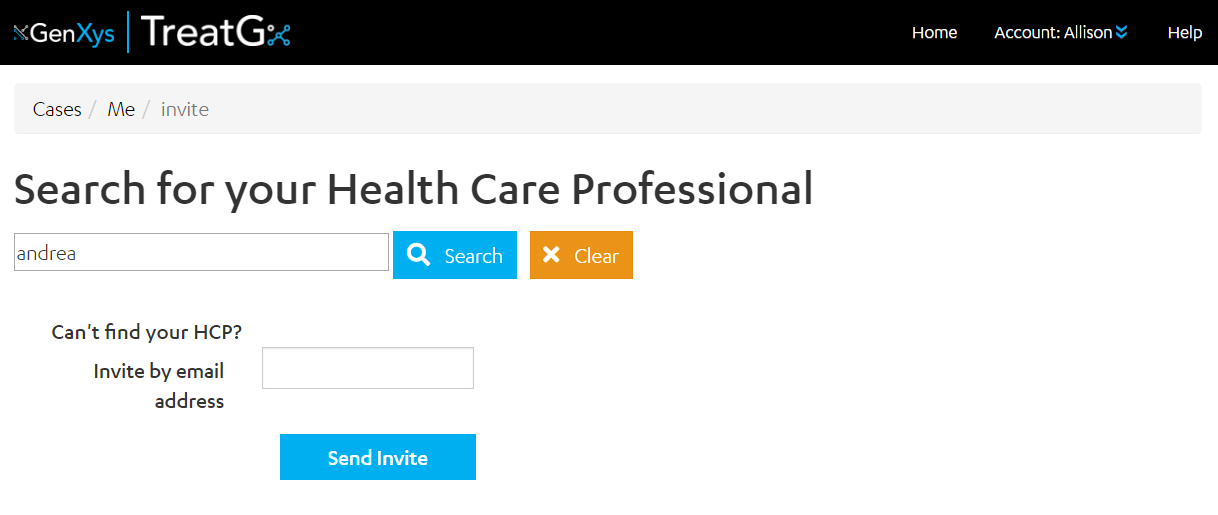
Your healthcare provider can accept your invitation by clicking the link in the email. For more information on healthcare provider accounts, click here.
Your healthcare provider can see changes you make to your profile by entering their account.
Use TreatGx to Manage Medications
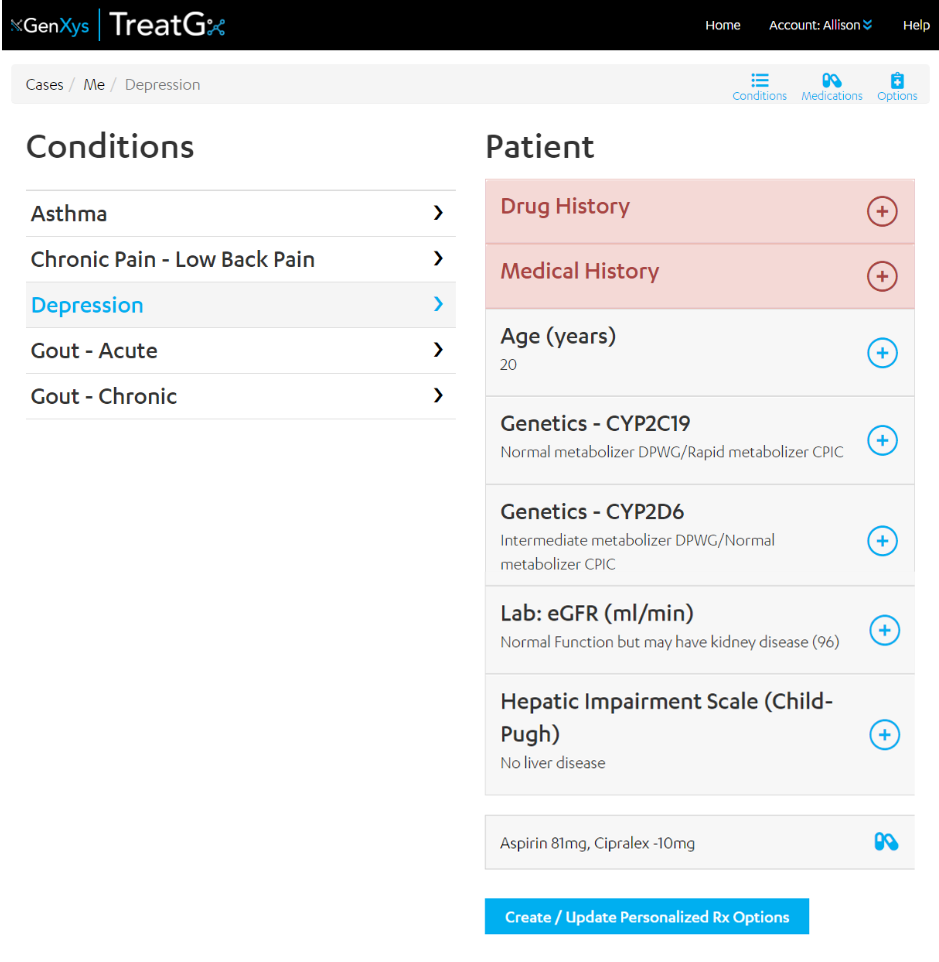
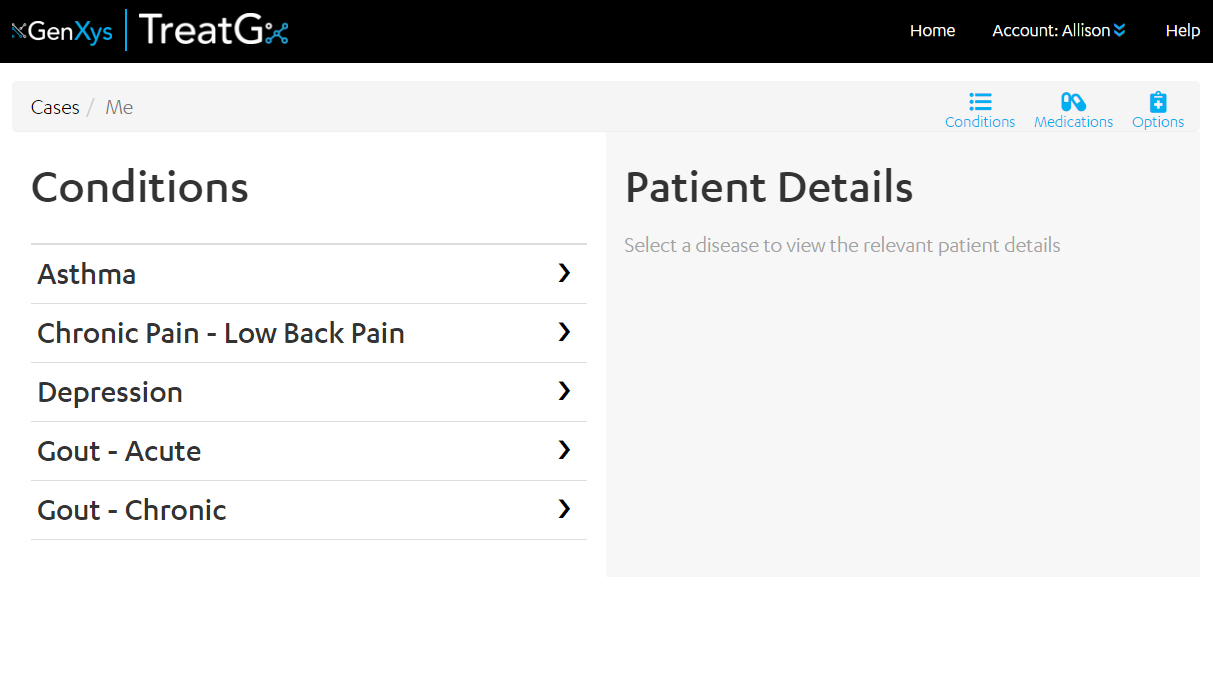
When ‘Medication Options’ is selected from the TreatGx dashboard, the ‘Conditions’ menu is seen on the left. You can update this list by selecting the ‘Conditions’ icon on the top right of the screen. For more details on how to update the list of conditions, click here.
When a condition is selected (for example: Gout – Acute) your details will appear on the right
– Sections in red indicate that more information is required to create/update medication options. Expand each section by clicking on the plus icon and enter or update your information.
– The first time you select a condition, it is important to check Drug and Medical History as these change from condition to condition.
– Your genetic information is preloaded when your sample has been processed.
Before selecting ‘Create/Update Personalized Rx Options’, it is important to check the information entered including Drug History, Medical History and Current Medications.
Tips for using TreatGx:
– In some sections, you can select “None of the above”. Please do this with caution after confirming none of the above apply.
– Some conditions ask for the dose of a drug or tests results. Make sure the units match your answer e.g. ml/min. Enter 0 for dose if you are not taking the medication.
– After entering or changing information, click “Create/Update Personalized Rx Options”.
Update Conditions
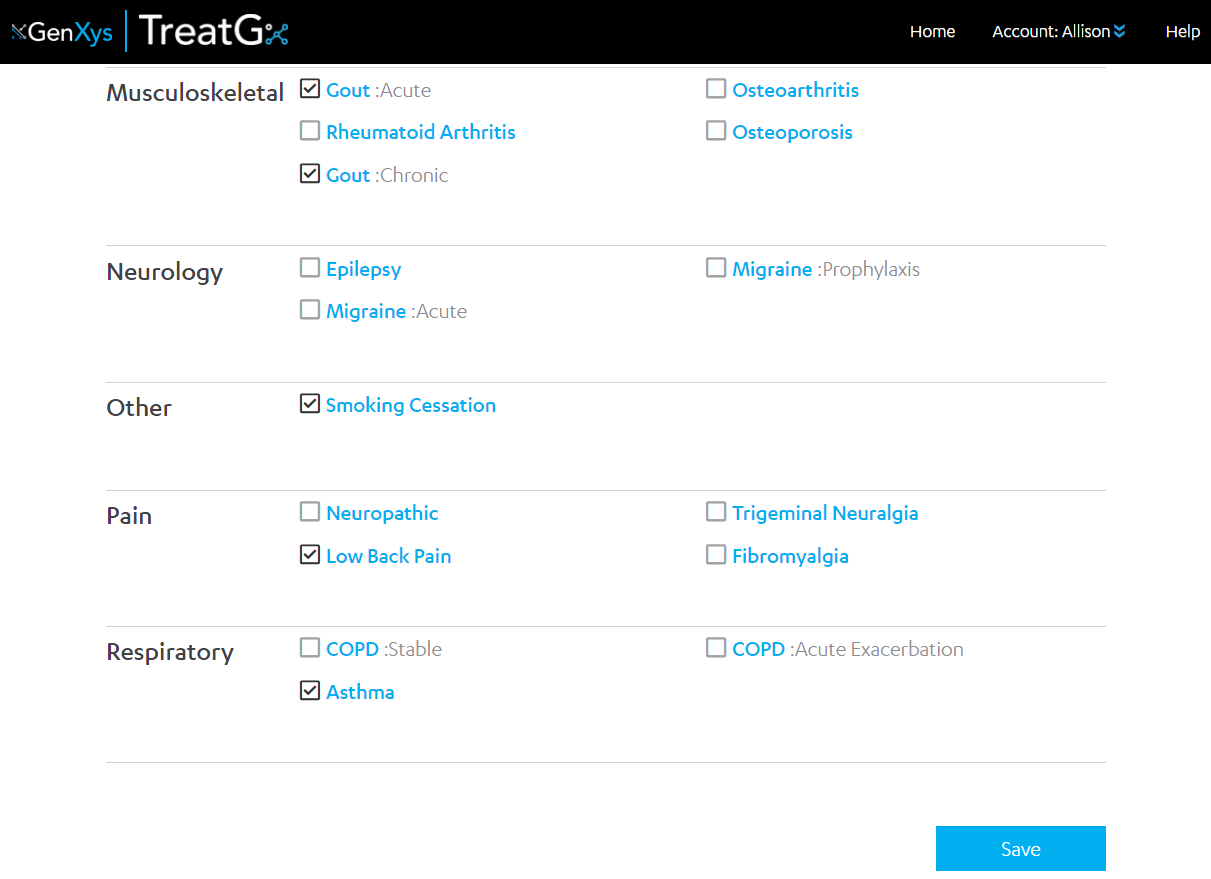
After you select ‘Current Conditions’ from the TreatGx dashboard, or the ‘Conditions’ icon on the top right of the screen, you can update your conditions in TreatGx.
Click the boxes to select your conditions.
After you select all your conditions, scroll to the bottom of the page and select ‘Save’. For a list of all the conditions covered in TreatGxPlus, click here. TreatGx is continuously expanding and new conditions are being developed regularly.
Using the Medication Options
Always consult with your healthcare provider before starting, stopping, or changing medications. Remember, medication is only one part of treatment; lifestyle changes including eating healthily and keeping active are vital aspects of managing your health.
After you click “Create/Update Personalized Rx Options”, the personalized medication options will be generated.
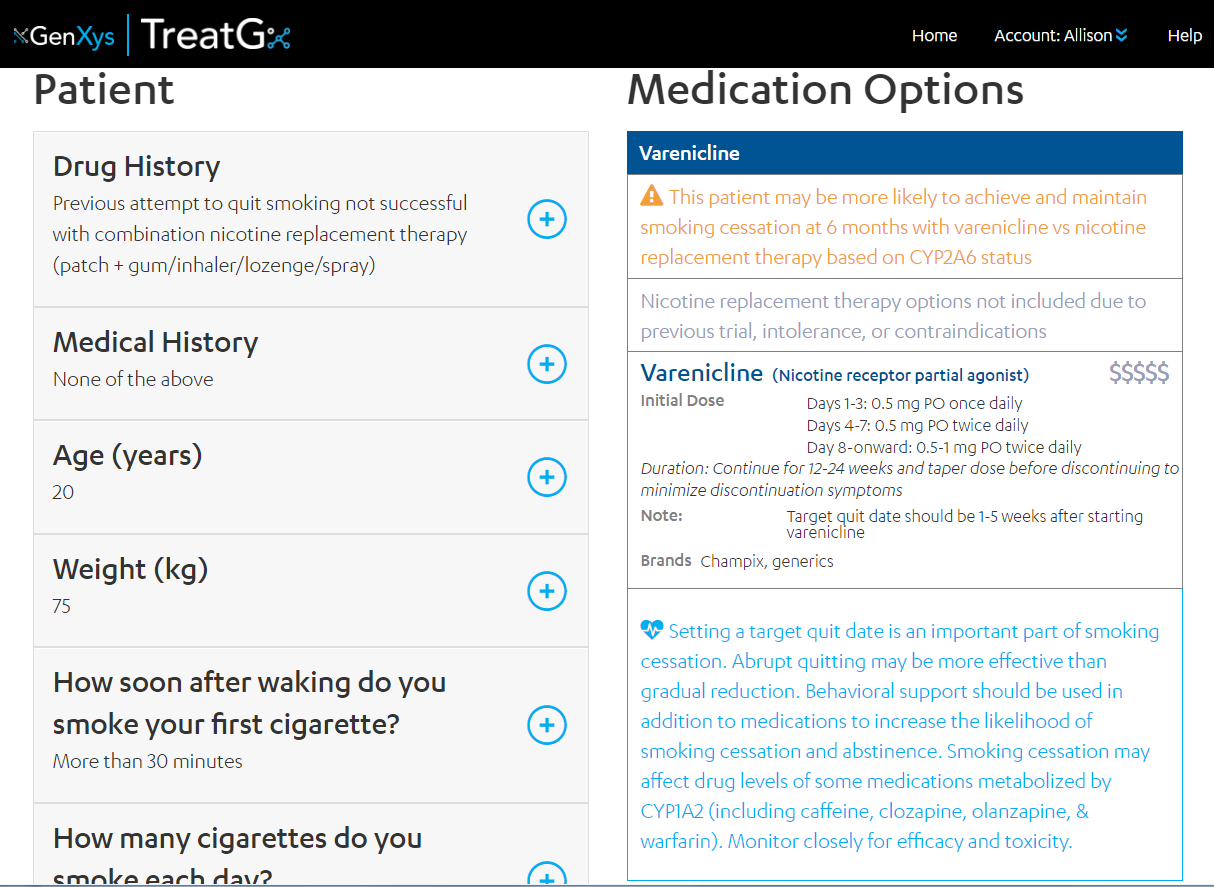
The personalized medication options include:
Your information: includes drug history, medical history, genetics, lab values and current medications
Drug classes
Each medication option includes:
– Generic drug name
– Individualized dose
– $ – Approximate drug cost relative to other drugs shown
– Relevant drug-drug interactions with an expandable icon to read more about the interactions
Additional guidance may include non-pharmacological treatments, advice on dosage forms, how to switch drugs or other clinical advice
The TreatGx decision support tool is just one tool that your healthcare providers use to ensure you receive the best personalize medication options tailored specifically to you. TreatGx is created using evidence-based medicine and includes all absolute contraindications, and major interactions with strong evidence when evaluating the safety of the medication options. Some monitoring of lower level interactions, medication response, and adverse reactions will continue to be done by your healthcare team.
TreatGx Video
TreatGx starts by considering your condition. After you select a condition, you can expand each section to enter your medical information. Your genetic information is uploaded automatically when you order online. After you enter all your health information and your genetic test is uploaded, you are ready to generate your personalized medication options


